Thursday, December 18, 2014

Ginger Cookies with Chocolate Chunks


Christmas is coming, Christmas is coming! Finals are done. I finished all my Christmas shopping. My sister's boyfriend graduated from college. Last weekend, I saw the Broadway show Newsies in Chicago with my sisters and mom. Now, my entire family is together (for the first time ever with all 9 of us) in Arizona. It's a busy time of year for me and basically every other person. Despite all the busyness, I love Christmas season: the snow, the beautiful lights and, of course, the baking!

My problem is always that I can't eat any normal Christmas cookies. Stupid dairy. So what do I do? Remake my favorites without the dairy! These cookies are a great combination of the classic gingerbread taste, with gooey dark chocolate. They are definitely different than your classic gingerbread Christmas cookie, but I like it. My mom has dubbed these one of her new favorite Christmas cookies, and I would place them on that list as well.


These cookies, definitely bring out the zingy ginger-taste. As of this summer, ginger has become one of my favorite flavors, especially ginger candy. The bonus of ginger is that it is great for stomach aches and indigestions too! Starting during my freshman year of college, I have had stomach problems more than a normal 20-something year-old should ( I blame the food at my school). This year, ginger has become my natural remedy for my upset stomach.

On that note, if you are not a huge fan of ginger, I would cut it back a little in this recipe. The dark chocolate helps to soften the flavor and cut the ginger-taste, but they are still very gingery!


Enjoy these cookies, the Christmas season, and all the family, friends, and delicious food that come with it!

Adapted from 101 Cookbooks
Makes about 4 dozen cookies


Ingredients:

2/3 cup coconut sugar
150 grams bitter sweet dairy free chocolate, chopped (I used 88% cacao)
2 cups whole wheat flour
1 tsp baking soda
4 1/2 teaspoons ginger
1/2 tsp salt
1/4 cup coconut oil
1/4 cup applesauce
1/4 cup molasses
1 1/2 Tbsp fresh grated ginger, peeled
1 egg, beaten


Directions:

1. Preheat oven to 350 F and line baking sheets with parchments paper.
2. Finely chop the chocolate bar into 1/8 inch pieces, or smaller
3. In a large bowl, whisk flour, baking soda, ground ginger, and salt together
4. Grate ginger. Heat coconut oil until just melted (I used the microwave). Stir in applesauce, molasses, sugar, and fresh grated ginger. Add the egg to the mixture, making sure the mixture is only warm, not hot. Finish mixing then add wet mixture to flour mixture and stir until combined. Stir in the chocolate.
5. Roll dough between palms into 1-inch balls then place a few inches apart on prepared baking sheet. Bake for 7-9 minutes until cookies puff up and tops darken and begin to crack.


Sunday, December 7, 2014

Pumpkin Muffins with Chocolate Chips


As previously, mentioned: I love fall. If you care to know the reasons why, look at my recipe for Apple Bread. If you care to eat amazing pumpkin muffins, keep reading here. This muffin is yet another great fall recipe. Technically, I should be posting Christmas recipes right now. It is the second week of December after all, and Christmas is coming oh-so-soon. Here in Indiana though, it's still feeling rather fall-ish. There's no snow on the ground, rather it has been 40 degrees and rainy this past week. Only one more week here though, then I am on my way to the motherland(!!!) AKA Minnesota....minus a stop to Chicago and Arizona on the way (or not so on the way). 

Anyways, back to the muffins. These muffins are sweet enough to eat as dessert, yet light enough to eat for breakfast. The recipe pairs the favorite fall pumpkin flavor with every women's year-round favorite: chocolate. When warm, the chocolate chips melt in your mouth for some great chocolatey goodness. These muffins are gluten-free and dairy-free as well as refined-sugar-free and oil-free. They are not flavor-free though, so no worries there. OH! They also pair great with coffee, which is important since we know I love foods that pair well with coffee.


Enjoy these muffins next time you want a great breakfast, snack, or dessert- because they're that good and that versatile. 

Adapted from Running with Spoons
Makes 8 muffins


Ingredients:


¼ cup almond butter
¾ cup canned pumpkin
1 egg
6 Tbsp. honey
½ cup rolled oats
2 Tbsp. ground flaxseed
1 tsp. ground cinnamon
½ tsp. ground nutmeg
½ tsp. ground cloves
1 tsp. vanilla extract
½ tsp. baking soda
¼ cup mini dairy-free chocolate chips, plus more for sprinkling


Directions:


1. Preheat oven to 375F and prepare a muffin pan by lining 8 cavities with muffin liners
2. Add all ingredients except chocolate chips to a blender and blend on high until batter is smooth and creamy.
3. Pour batter into bowl and stir in chocolate chips by hand
3. Scoop batter into prepared muffin pan, filling each cavity until it is about ¾ full
4. Bake for 12-15 minutes, until the tops of muffins are set and a toothpick inserted into the middle comes out clean. Check muffins at 10 minutes and sprinkle with extra chocolate chips. When done, allow muffins to cool in pan for about 10 minutes before inverting onto cooling rack. 
5. Muffins can be stored in an air-tight container for up to a week

Saturday, November 29, 2014

Apple Cinnamon Bread


Fall is my favorite season. It always has been, and probably always will be. Growing up, this was because my birthday is in the Fall (October 15 to be exact). In high school, this also meant volleyball season and Friday night football games. I loved warm bonfires on a chilly night, having an excuse to drink warm drinks, and LOVED the Fall colors. Now, much of this is still the same, I love the colors, love drinking warm drinks, and shockingly, by birthday is still in the Fall. Soccer games have replaced football games (thanks Josh), and I spend a good majority of my time salivating over Fall recipes. If it has pumpkin, apple, or sweet potato in it, you better believe that recipe is getting saved to be made later. As I've mentioned previously though, I'm not a huge fan of sharing a kitchen with 300 girls (because yes, I do still live in a dorm). Therefore, these recipes pile up until I'm home for Thanksgiving, then voila! our empty kitchen turns into my test space for a week.


All that to say, this was one of the Fall themed items I made during Thanksgiving break this year. This apple bread is amazing. It's moist and soft, and I can easily eat half the loaf by myself. The type of apple used plays a key part the success of this bread. Originally, I used Braeburn apples because it was all I had on hand, but this didn't give the bread the distinct apple taste I was going for. The next time I used a sweeter Cortland apple, which gave the bread the perfect sweet, apple taste I had hoped for. At first, I had some trouble with baking the bread all the way through. The first batch crumbled at the touch of a knife because it was so moist and undone, but a couple tries later, I nailed it. The bread definitely does not rise like banana bread (it is made of nuts and oats after all), which means it is more dense than a flour-made loaf of bread.


Hope you enjoy this Fall recipe as much as I do!


Adapted from Nutrition Stripped
Makes 1 large loaf or 2 small loaves

Ingredients:

5 small (about 520g) apples
2 whole eggs + 2 egg whites
2 Tbsp coconut oil
2 Tbsp maple syrup
1 tsp vanilla extract
1 cup oat flour
1 cup almond flour
1/2 cup coconut flour
1 tsp baking powder
1 tsp baking soda
1 1/4 tsp ground cinnamon
1/8 tsp ground nutmeg
1/4 tsp ground ginger

Directions:

1. Preheat oven to 350 F and line 9 x 5 in.  or two 6 x 3 in. bread pan with parchment paper
2. In a high speed blender, combine apples, eggs, maple syrup, coconut oil, and vanilla and blend until smooth.
3. In a large mixing bowl, combine flours with baking soda, baking powder, cinnamon, nutmeg, and ginger. Stir to combine. Pour wet ingredients from the blender into the dry mixing bowl. Stir until combined into a dough. Dough should hold its shape and stick to the sides of the bowl when stirred
4. Pour the batter in prepared pan and spread evenly
5. Bake for 50-55 minutes for a large loaf or 34-45 minutes for small loaves. If bread becomes too brown while baking, cover pan with tin foil. Test bread doneness by inserting a knife or toothpick; if it comes out clean, it's done.
6. Let bread cool in pan for 10 minutes before inverting and slicing
7. Enjoy toasted and serve with apple butter, pumpkin butter, honey, or simply plain!
8. Store leftover bread in fridge for 4-5 days or freeze individual slices for later use. Wrap bread in air-tight cling wrap for best results then toast to reheat.

Monday, August 18, 2014

Fig Zucchini Pasta and Hemp Seed Crumble


Being summer time, I love eating fresh fruit and vegetables. My mom and I grow a vegetable garden every year, and one of our (and many people's) biggest yielding crops is our zucchini. I am always looking for new recipes to use our abundance of zucchini in. This recipe caught my eye because it looked so fresh and easy to make. Plus, it had figs! Figs are one of my favorite foods, both dried and fresh. Once again, being summer, there are plenty of fresh figs in the store!

Lauren and I made this dish the other week (when we also made No-Bake Chocolate Peanut Butter Oat Bars and Raw Peach Cheesecake). Let me tell you, this dish is actually amazing. I can't even express how amazing it is. It took about 15 minutes total to make and was gone it about 5. We both went back for seconds and only had a tiny bit left over. The figs add a sweet taste, while the garlic in the hemp crumble gives it a savory taste. The zucchini pasta is light and fresh, yet the crumble adds some protein and substance to the dish.

The Hemp Seed Crumble, as you may notice, makes a little extra than you need for the pasta. The crumble tastes cheesy and can be used a vegan parmesan cheese. It works great on any type of pasta, salads, or even on pizza!


Adapted from Nutrition Stripped
Serves 2

Ingredients:

Pasta:

2 zucchini, spiralized
2 cups fresh mission figs, sliced
1/2 avocado, diced
juice of 1 lemon
1 Tbsp olive oil
pinch of sea salt
dash of black pepper

Crumble:

Makes 4 Servings
3 Tbsp walnuts, chopped
2 Tbsp hemp seeds
2 Tbsp pine nuts, lightly toasted and chopped
1 Tbsp nutritional yeast flakes
pinch of sea salt
1/2 clove of garlic

Directions:

Pasta:

1. Spiralize the zucchini. This will vary depending on your spiralizer. Cut the end off each zucchini before spiralizing, then peel the long way. If you don't have a spiralizer, you can use a vegetable peeler instead. Place zucchini in large bowl.
2. Add sliced figs and diced avocado and stir.
3. Add the lemond juice, olive oil, and salt and pepper to taste.
4. Top with Hemp Seed Crumble. (I use about half of the crumble and save the rest)
5. Enjoy immediately! Extras should be kept in the fridge.

Crumble:

1. Toast pine nuts until fragrant and golden in color.
2. Using a knife or food processor, chop the walnuts and pine nuts until they are coarsely crumbled.
3. Add nuts hemp seeds, nutritional yeast, and garlic to small bowl and stir until combined.
4. Add sea salt to taste.
5. Crumble will keep in the refrigerator for 3 weeks.


Saturday, August 16, 2014

No-Bake Chocolate Peanut Butter Oat Bars


My willingness to write long descriptions of my food endeavors is close to nonexistent right now. I currently have 6 recipes written up and photographed simply waiting to get a description, therefore this is going to be brief. But who wants a long intro anyways? I'd rather just get to making some yummy food!

Anyways, last week my good friend Lauren (owner of Not Your Ordinary Kitchen) came over and we whipped up these babies, along with Fig Zucchini Pasta and 2 others things (to be posted soon). Basically, these bars are good- real good. They take about 5 minutes to make and an hour in the freezer. They are very rich, so the mini bar size is perfect. Eating these is almost like eating Muddy Buddies, but in a bar- so like heaven. There we go, brief intro! Now eat up!!


Adapted from Hungry Happens
Makes 24 mini bars; 200 calories per bar

Ingredients:

1 cup natural creamy peanut butter
1/2 cup maple syrup
1/2 cup coconut oil
2 cups rolled oats
1 cup dairy free chocolate chips
1 tsp vanilla extract

Directions:

1. Line and 8x8 inch baking dish with parchment paper
2. In a medium bowl melt peanut butter, maple syrups, and coconut oil in microwave; takes about 1 minute. Stir occasionally to keep mixture from burning.
3. Remove from microwave and mix in the rest of the ingredients.
4. Pour mixture into prepared baking dish, smoothing top with spatula. Freeze for 1-2 hours or until set.
5. Pull entire dessert out of baking dish then cut into 24 bars. Do this quickly as bars soften fast! Enjoy! Store leftover bars in airtight container in fridge.


Tuesday, June 3, 2014

Banana Nut Granola

Banana Nut Granola

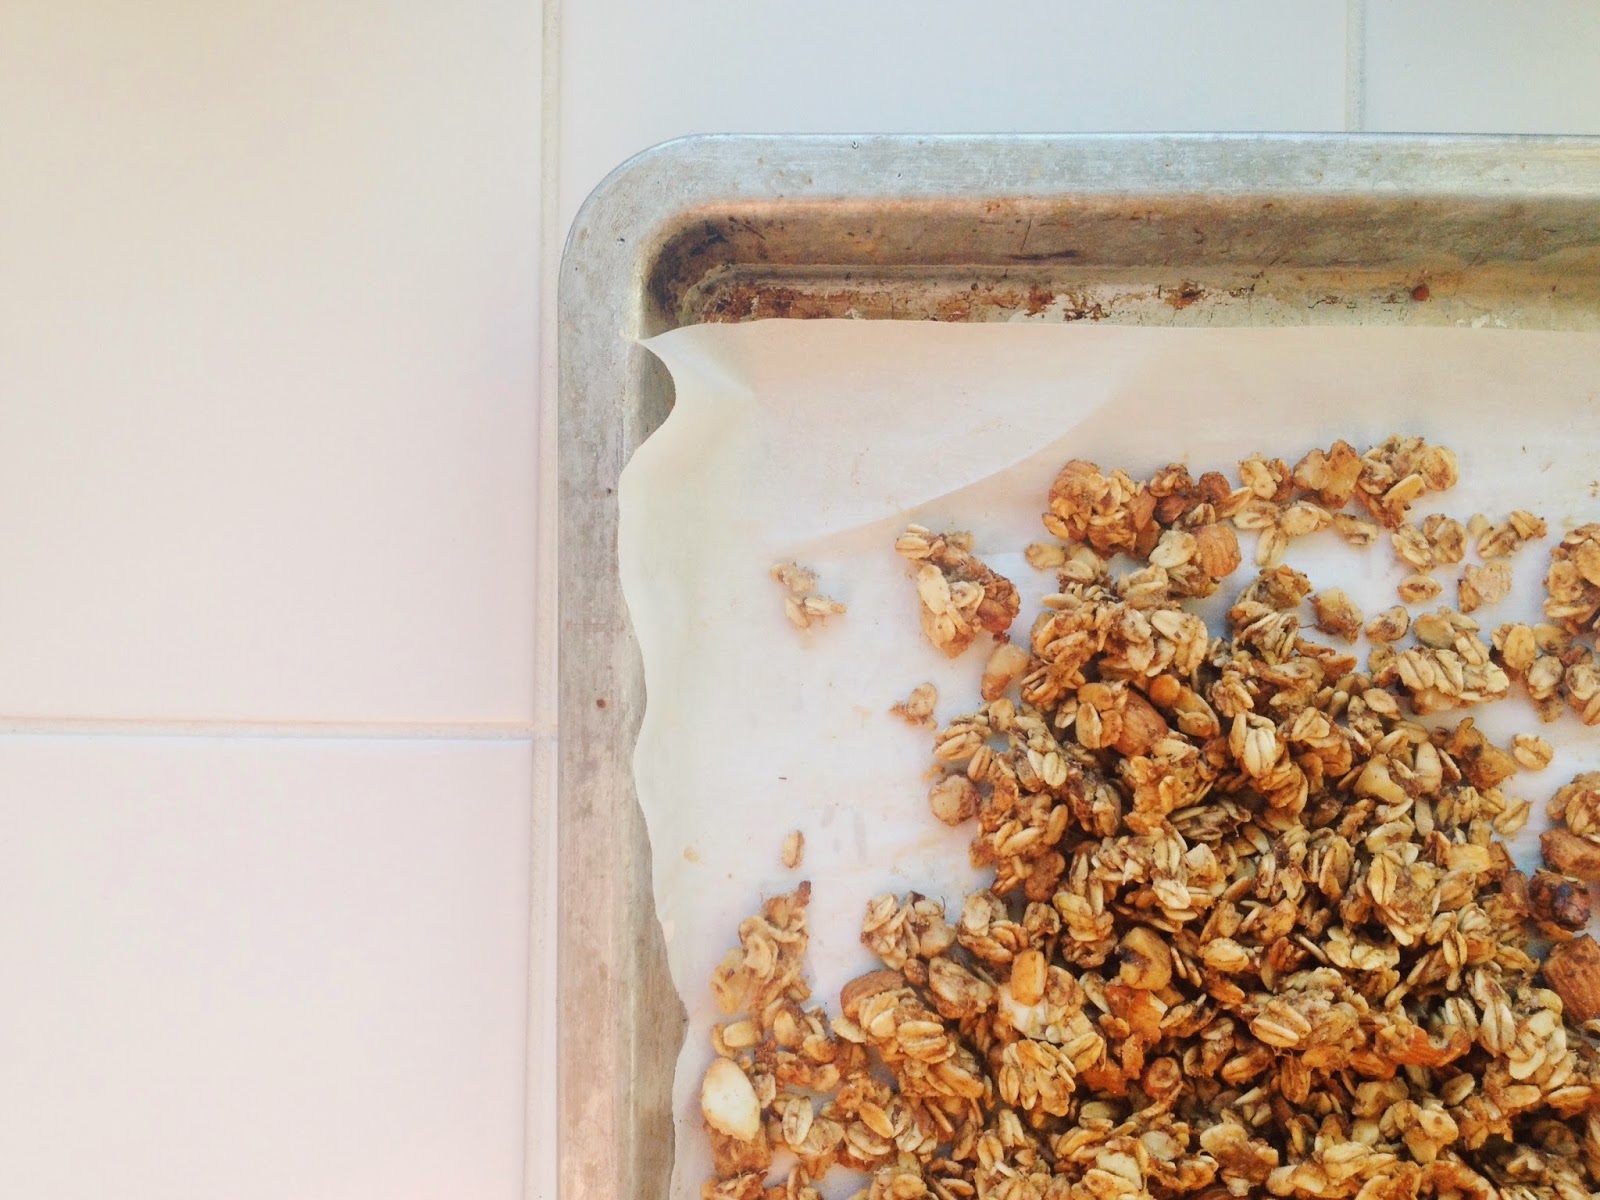
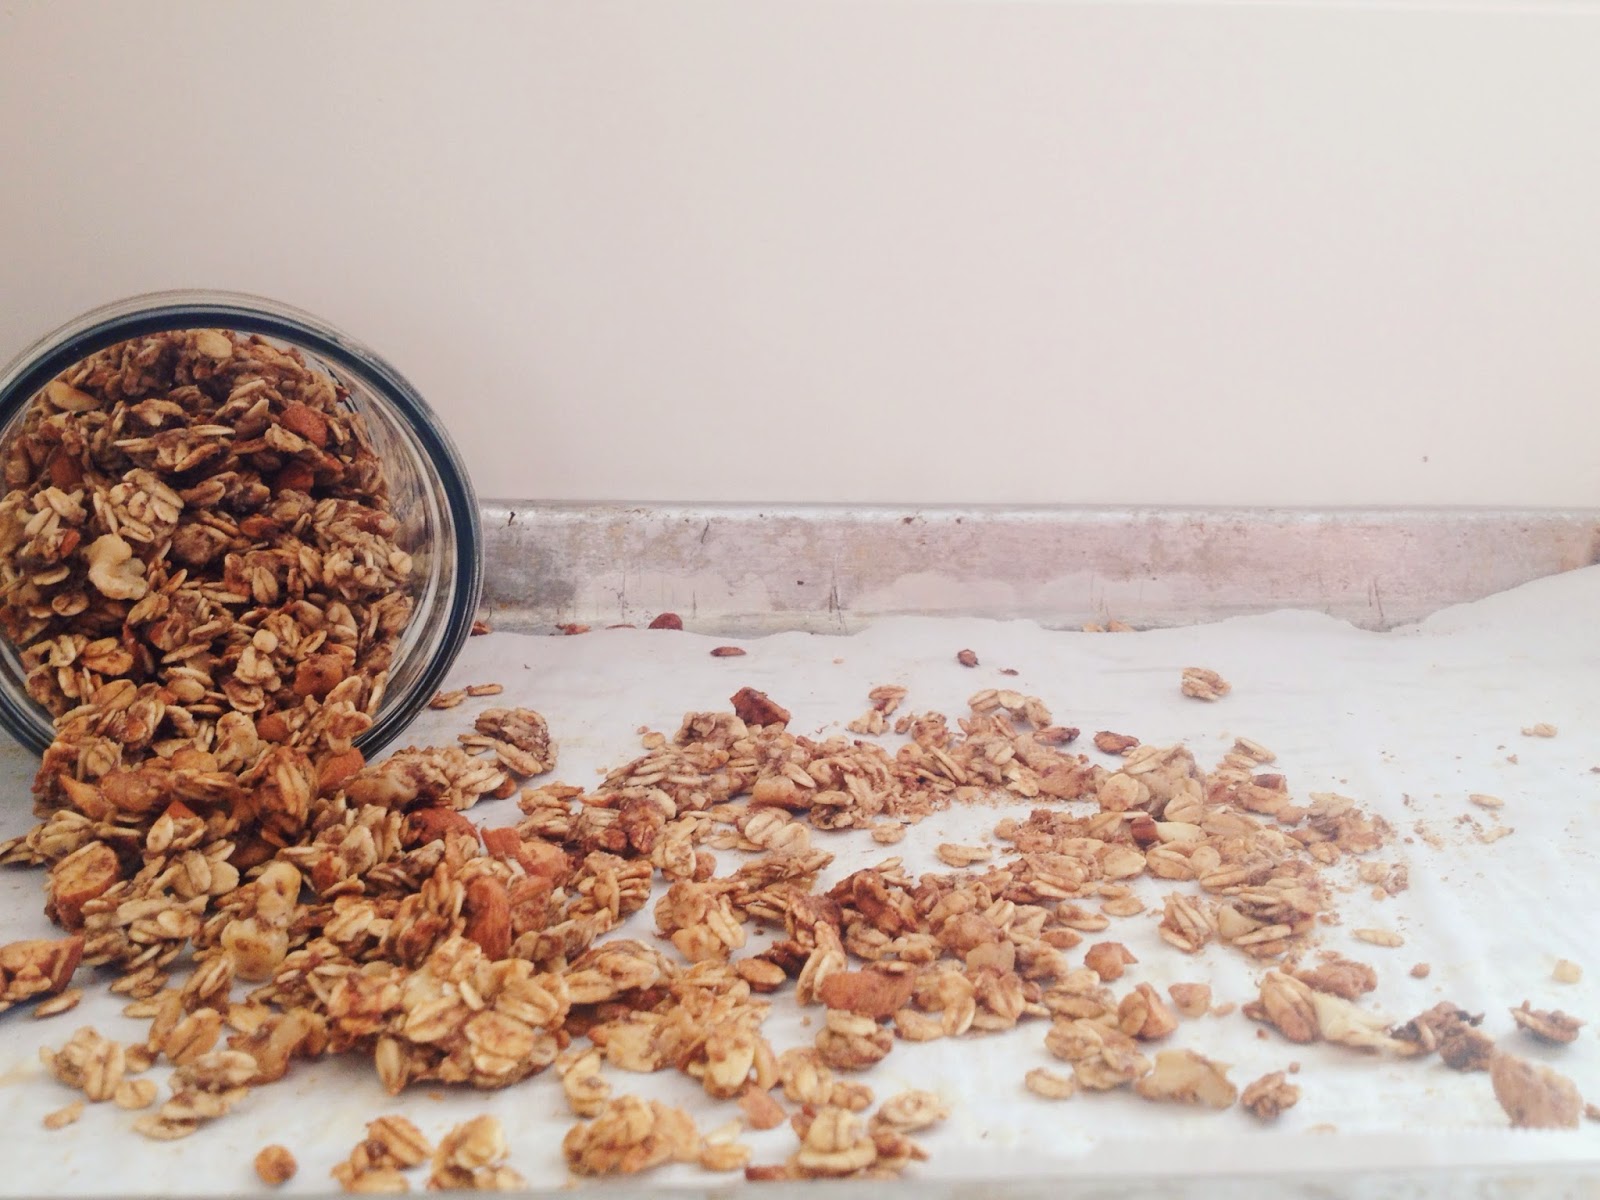
Granola truly is one of the best foods. It works as breakfast with a little bit of milk, mixed into yogurt, on top of a smoothie, and is a great snack on the go as well. This granola recipe is honestly amazing. The banana really shines through and makes it naturally sweet. I'm very proud of it because it's my own recipe, and I got it right the first time! Two serious victories for me.

Banana Nut GranolaBanana Nut Granola


When making this granola, I chose to use almonds and walnuts for their mild flavor in comparison to some other nuts and seeds. They are also two of my favorite nuts to eat once they are roasted, as roasting them brings out a whole new flavor and texture. I tested the recipe with and without cinnamon; both taste great, but the little bit of cinnamon helps balance out the sweetness just a touch. Finally, most granolas would call for some sort of oil. Instead, I used almond butter, which has fat and oil in it, but also keeps the granola a little more clumpy (which I love).

While baking, be sure to mix thoroughly after the first 10 minutes or you will end up with a big granola pancake. Also, you are going to want to pull it out a little early because it starts to darken pretty quickly after the first 15 minutes. Do not do this!! Be patient and stir more frequently if it starts to darken too much. Pulling it out early will make the granola more chewy and less crunchy.


Eat up!


Makes about 5 cups; 118 calories per 1/4 cup

Ingredients:

3 cups rolled oats
1/2 cup almonds, coarsely chopped
1/2 cup walnuts, coarsely chopped
1/4 cup ground flaxseed
1/2 tsp cinnamon
pinch of salt
3 small very ripe bananas (or 2 large), mashed
3 Tbsp maple syrup
2 Tbsp almond butter, melted


Directions:

1. Preheat oven to 375 F and line two baking trays with parchment paper.
2. Stir oats, almonds, walnuts, and flaxseed together in large bowl.
3. Add bananas, maple syrup, and almond butter to dry ingredients, stirring thoroughly to separate all banana and almond butter chunks.
4. Divide granola into two equal parts and spread mixture evenly on each baking tray.
5. Bake for 10 minutes then stir well, breaking the granola apart as you stir. Bake for another 10-15 minutes, stirring every 5 minutes so granola does not burn.

Thursday, May 29, 2014

Cinnamon Pancakes with Peach Sauce

Cinnamon Pancakes with Peach Sauce

It's the last week of school before finals for my little sister, and today is a big test day. What better way to start the day than homemade pancakes? Actually, I just wanted to make pancakes and this was a good excuse. As has been previously stated in my past two pancakes recipes here and here, I love pancakes. If I had to choose one food to eat for the rest of my life, it would be pancakes, hands down.

Cinnamon Pancakes with Peach Sauce

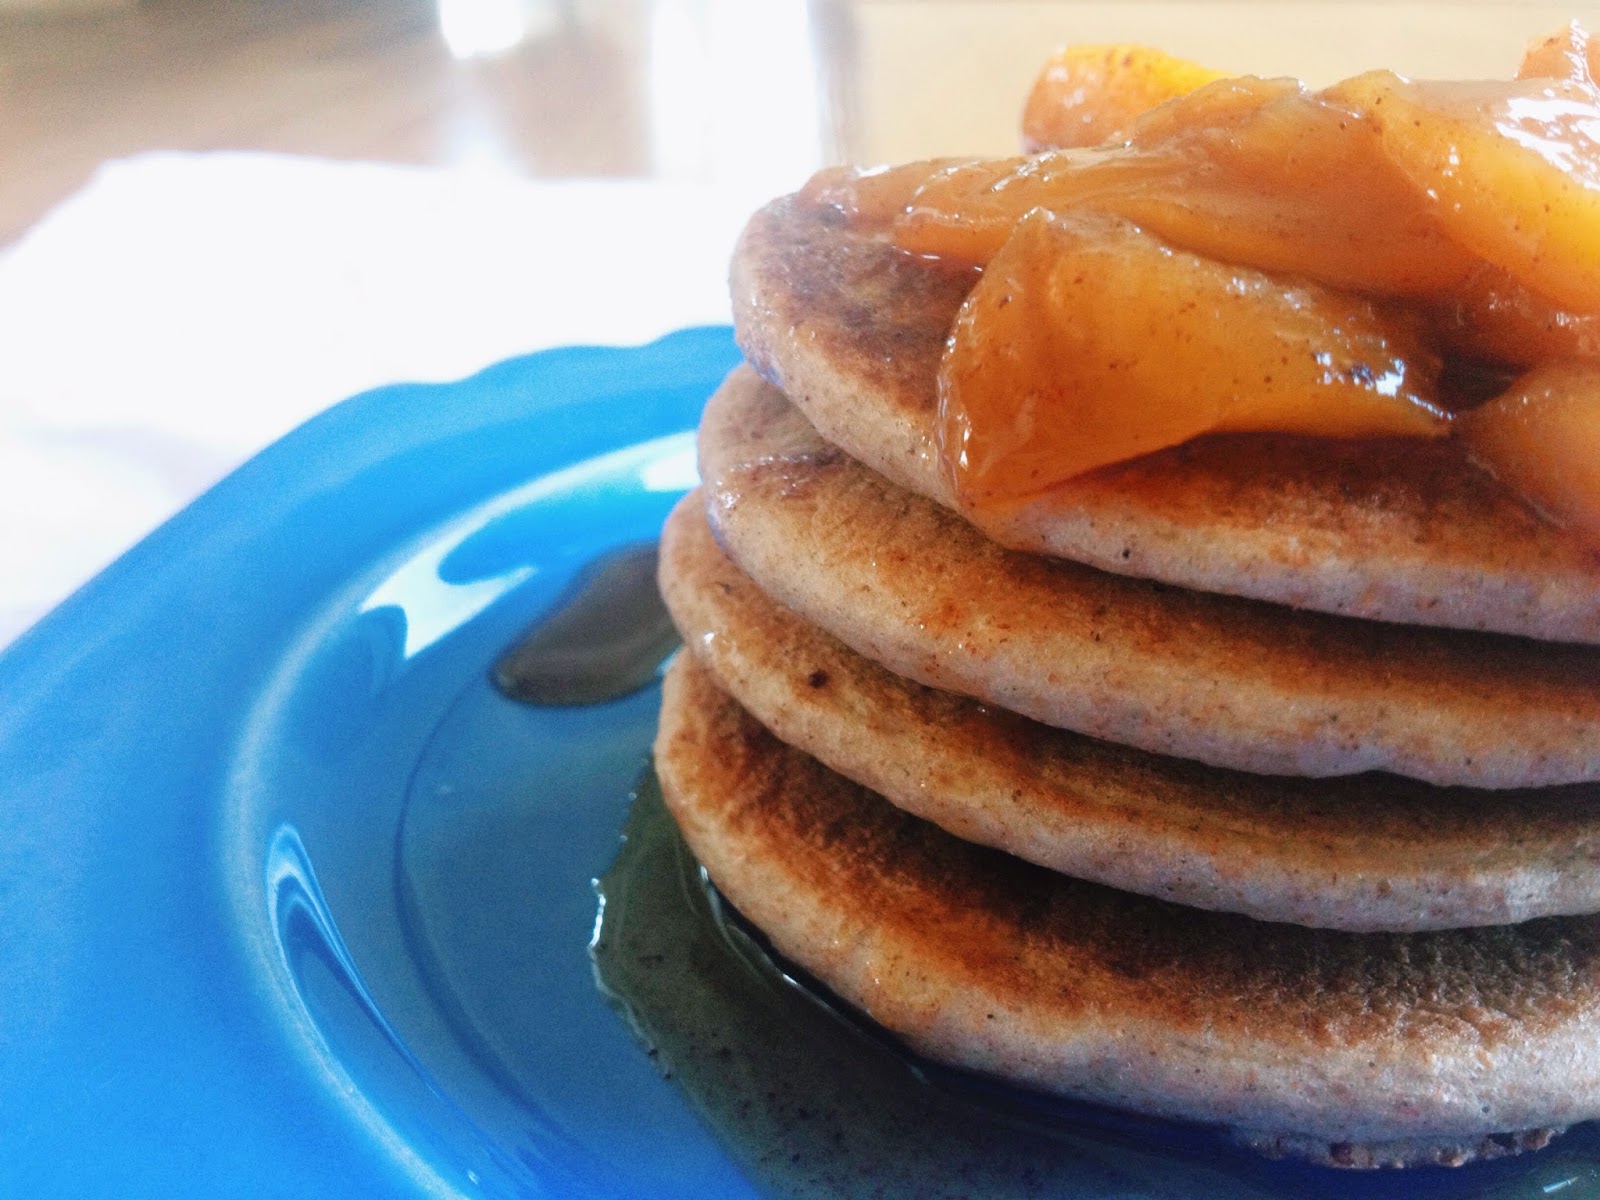
This recipe was super simple, and the pancakes turned out amazing. I dare you to only eat one. These pancakes are very fluffy and light, which makes eating six of them easy to do. The applesauce in the recipe is used to replace the oil, contributing to the light factor and the overeating factor. The original recipe called for all whole wheat flour. In order to make them a little more sister-friendly, I replaced half with all-purpose flour. Both versions would work well! I also altered the pancakes by adding extra cinnamon and a little maple syrup in order to make them more flavorful.

The sauce here is optional, but it adds a great deal of flavor to the pancakes, so I would highly recommend it. I would argue the sauce is what makes these pancakes almost addicting. It is sweet from the syrup with a great fruity flavor, and of course, more cinnamon. The peaches are perfect for the summer season we are entering into, but could be replaced by apples if you wanted to. I wouldn't mind eating this sauce plain. at all.

Cinnamon Pancakes with Peach SauceAdapted from Hungry Happens
Makes 20-24 pancakes
60 calories per pancake; 30 calories per Tbsp sauce

Ingredients:

Pancakes:
1 cup all-purpose flour
1 1/4 cup whole wheat flour
1 Tbsp baking powder
1 1/4 tsp cinnamon
3 egg whites, beaten
1 cup applesauce
1 1/2 cup almond milk
1 tsp maple syrup

Sauce:
1/2 tsp coconut oil
5 Tbsp maple syrup
2 peaches, peeled and sliced OR 1.5 cups frozen peach slices
1 tsp cinnamon

Directions:

1. Whisk dry ingredients together in medium sized bowl then add wet ingredients and stir until combined.
2. Heat a non-stick pan on medium heat.
3. While pan is heating, combine all sauce ingredients in sauce pan and bring to a boil. Lower heat and allow to simmer and thicken while pancakes cook (or about 15 minutes).
4. Pour about 1/4 cup of batter onto pan and cook a couple of minutes until bubbles form. Flip, then cook other side.
5. Repeat with next several batches.

Tuesday, May 27, 2014

Whole Wheat Blueberry Muffins


Blueberry Muffins

Finals are done, I am home in Minnesota, and summer is here! This also means I am finally able to spend some much needed time in my (mom's) lovely kitchen. My stay will be short this time, as I am heading to Nepal on a 7 week missions trip in less than 3 weeks (eek). I am maximizing this time with days filled with friends, the vegetable garden, pilates, and making delicious food.


Blueberry Muffins

First on the list was blueberry muffins. I found this recipe in a book my sister-in-law gave my mom for Mother's Day called Superfood Kitchen by Julie Morris. I'm loving the recipe book so far and the extra health info it gives on many superfoods.

These muffins are more dense than your average bakery muffin, which makes them very filling despite their smaller-than-a-bakery size. They are the perfect sweetness for a breakfast muffin; the fresh blueberries help hit the sweet tooth, but they don't make me feel like I just consumed a dessert. They are made with 100% whole wheat flour and are vegan since they are made with almond milk, maple syrup, and coconut oil. The applesauce replaces some the the coconut oil, so if I wanted to I could give it a "low-fat" label. I'm not usually about labeling foods with health claims though, and would rather just enjoy a good, fresh-baked muffin.

Here's to summer!


Blueberry Muffins

Makes 12 muffins; 150 calories per muffin

Ingredients:

1 3/4 cups whole wheat flour
2 tsp baking powder
1/2 tsp baking soda
1/2 tsp sea salt
1/2 cup almond milk (or nut-milk of choice)
1/2 cup applesauce
1/3 cup maple syrup
2 Tbsp melted coconut oil
1 tsp fresh lemon zest
1 1/2 cups fresh or frozen blueberries


Directions:

1. Preheat oven to 350 F and line a 12-cup muffin tin with paper liners.
2. Stir together  flour, baking powder, baking soda, and salt in a large bowl.
3. In a large liquid measuring cup measure and stir together the nut milk, apple sauce, maple syrups, coconut oil, and lend zest. (The measuring cup doubles as the bowl and the measuring cup very nicely.)
4. add the wet ingredients to the dry ingredients and stir until just combined. Do not over stir, as the batter is supposed to be lumpy.
5. In a small bowl, measure out the blueberries and add a handful of flour to the bowl. Toss the berries, making sure they are fully coated with flour. This will keep the berries from sinking to the bottom of the muffin tin while in the oven.
6. Scoop the batter equally into the prepared muffin tins. This makes exactly 12 muffins; there should be no batter left over.
7. Bake the muffins for 24-28 minutes, or until tops turn golden brown and a toothpick comes out clean.

Thursday, March 27, 2014

Chocolate Oatmeal Cookies


Chocolate Oatmeal Cookies

Chocolate has been calling my name lately, which is odd because I am normally not a chocolate-craving person. On the other hand, black beans in cookies always scare me a little. I am always scared the cookie will be too 'beany.' These cookies do not fall into that trap. The chocolate shines right on through and really hits the chocolate-craving spot. They are so easy to make and use household staple ingredients (or at least Hawkins household staples).

A bonus of these cookies? They are dairy free, refined sugar free, and vegan. The could also be made gluten free by using gluten free rolled oats. Another bonus? The family liked them. Emma even asked for a second one. This is always the biggest test, and the cookies passed!

So enjoy some chocolatey goodness!

Chocolate Oatmeal Cookie Dough

Chocolate Oatmeal Cookies

Makes 10-12 large cookies or 20-24 small cookies
Adapted from Deliciously Ella

Ingredients:

2 cups black beans (1 1/3 16-ounce cans)
1/2 cup maple syrup
2 heaped Tbsp cacao powder
2 Tbsp coconut oil
1 1/2 cup rolled oats
1/4 cup cacao nibs

Directions:

1. Preheat oven to 350 F. Line cookie sheet with parchment paper.
2. Drain and rinse black beans. Add black beans, maple syrup, cacao, and coconut oil to blender and blend until smooth.
3. Transfer chocolate mixture to bowl. Add oats and nibs to bowl, and stir until combined.
4. Scoop large spoonfuls of cookie dough, roll into balls, and place on cookie sheet. Flatten cookies slightly using your fingers or the back of a spoon; cookies will not expand while baking.
5. Bake for 17-20 minutes, until firm. Let cool then enjoy!

Wednesday, March 26, 2014

Sunny Ginger Lemonade


Strawberry Ginger Lemonade

Spring break is upon us, which means I have spent the last few days basking in the sun and drinking cold, fruity drinks. Spring break was much needed for me this year. With school and the amount I am working, I was in need of some Arizona sun and time to relax. Arizona is one of my favorite places to go. There's great food everywhere, countless mountains for hiking, and it's the perfect temperature this time of year. 

With the amount of time I spend (sweating) in the sun, I end up drinking so much liquid. The majority is water, but this drink is a fun way to mix it up in the middle of the day. It's quick to make, and so refreshing. The ginger gives it a little kick and also gives it a little effervescence. I used strawberries because that's what we had on hand, but the original recipe used soaked goji berries, which I can only imagine would be amazing. Feel free to use agave or honey, depending on your taste and dietary (vegan) preference.

Strawberry Ginger Lemonade

Strawberry Ginger Lemonade

Serves 2

Ingredients:

Juice from 1 large lemon
3 cups water
5 strawberries
1-2 tsp fresh grated ginger
Agave/honey to taste

Directions:

1. Add all ingredients to blender and blend until liquefied
2. Fill two large glasses 2/3 full with ice and pour drink to fill cup
3. Enjoy!

Friday, March 7, 2014

One-Minute Muffin

One-Minute Microwave Muffin

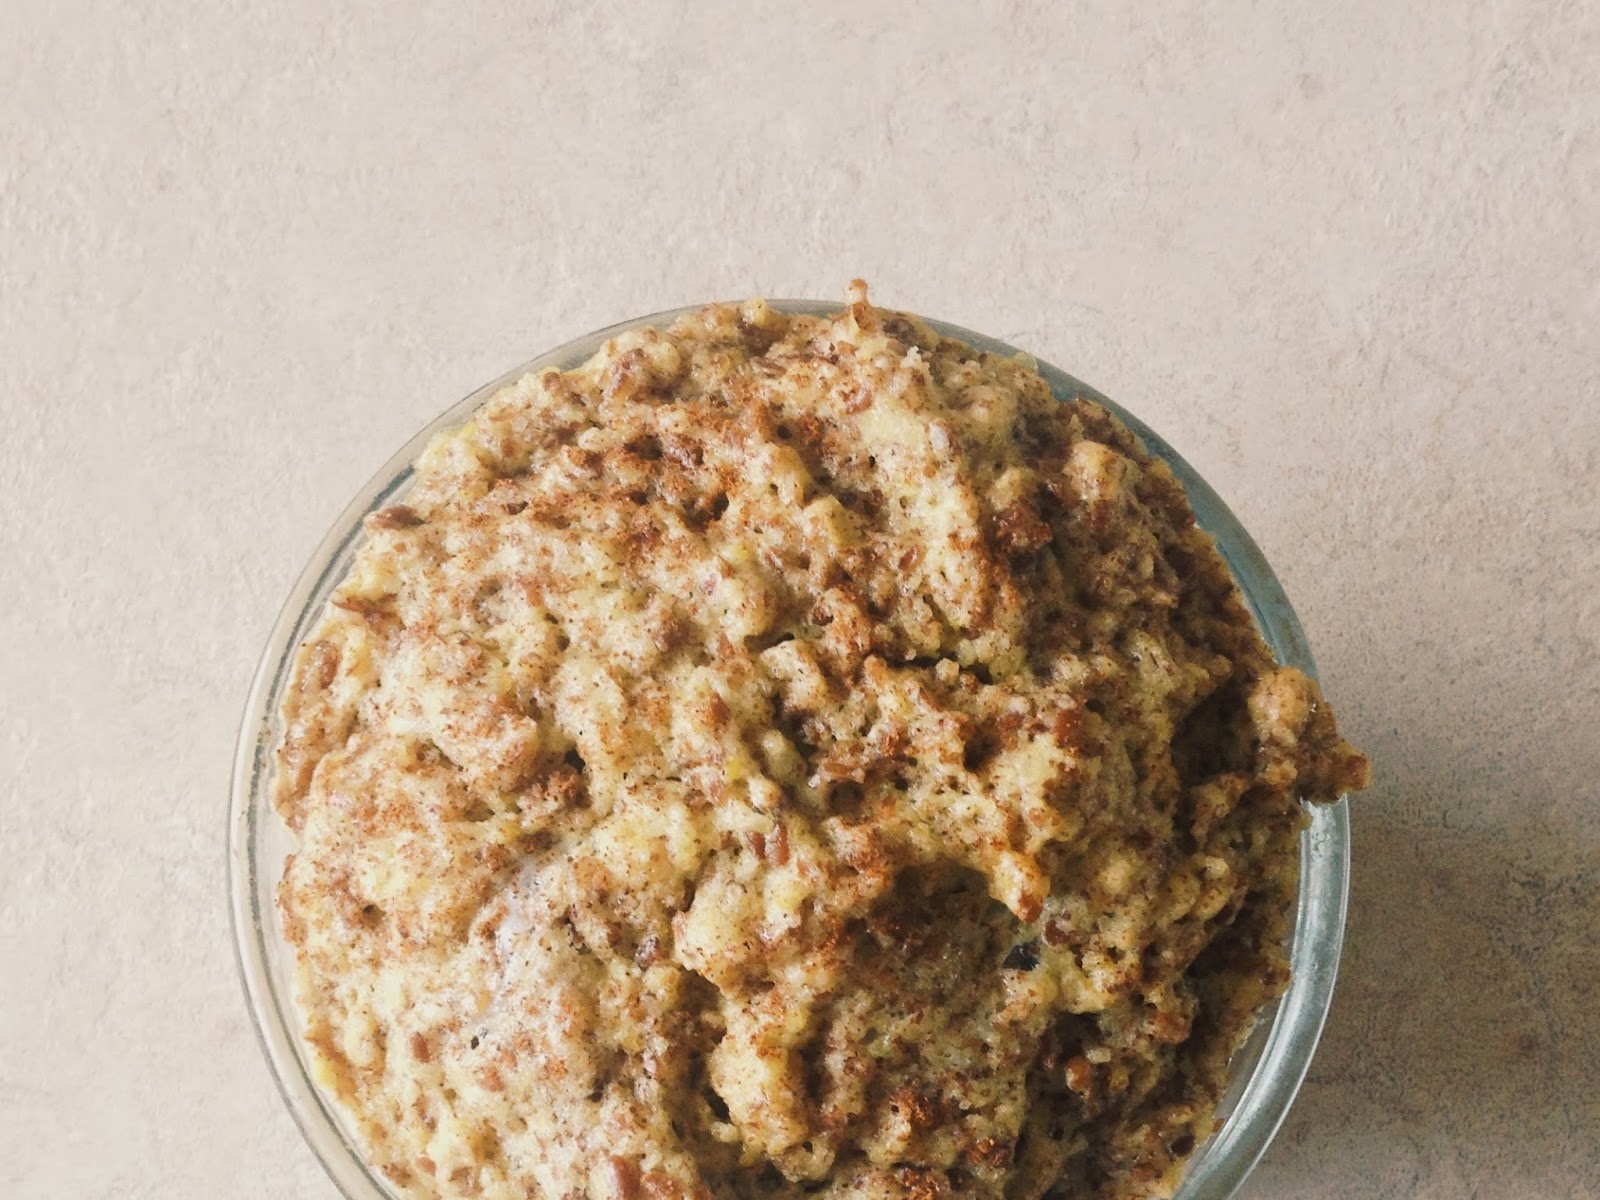
A couple of weeks ago my mom sent me the recipe for this muffin, then a couple days later sent me the ingredients in the mail (#1 mom). Since then, it has become a breakfast favorite for both of us. It takes a minute to stir together, a minute to cook, and has virtually no clean up- basically perfect for at college. 

I tweaked the muffin a little (of course) by adding some honey to sweeten it and throwing in some cacao nibs. I loved it with the cacao; they added a little crunch and, of course, that chocolatey goodness. My mom said she's been putting raisins in it for my dad, so it's easy to mix and match add-ins depending what you like in muffins!

I make this in a 4-inch glass ramekin, but I'm sure it would work in a coffee mug too. This muffin is gluten free, and as always, it's dairy free as well. It contains egg and honey, so it's not vegan, but I'm going to try replacing the egg with a chia egg this weekend to see how it turns out. (keep you updated). Update: This muffin can be easily be made vegan. Replace the honey with agave nectar or coconut sugar, and replace the egg for a chia egg*. The chia egg version will be more dense and not rise as much, but it will also be more moist. Both versions are equally as delicious!

My only caution in making this muffin is to make sure the egg is mixed in well- or else you will end up with white coagulated egg chunks in your muffin. This doesn't affect the taste, but it makes it less pretty. 

Enjoy this quick weekend (or week day) treat! 


One-Minute Microwave Muffin

Makes 1 muffin
360 calories per muffin

Ingredients:

1/4 cup Almond Flour
2 Tbsp. Golden Flaxseed Meal (or grind your own seeds)
Pinch Sea Salt 
1/2 tsp. Baking Powder
2 tsp. Honey (agave nectar or coconut sugar work too)
1 tsp. Coconut Oil
1 Large Egg (or chia egg*)

Optional add-ins:
2 tsp. Cacao Nibs + 1 tsp Cacao Powder
1 Tbsp. Raisins + 1/2 tsp Cinnamon
1/3 mashed banana + 1 Tbsp coconut


Directions:

1. Melt oil in a 4 1/2 in. ramekin dish (or a coffee mug works too)
2. Whisk egg into the melted coconut oil.
3. Add almond flour, flaxseed meal, honey, cinnamon, baking powder, and salt. Mix well.
5. Cook for 45-50 seconds in microwave. (Watch for bubbling over)
6. Eat right from the bowl with a fork or remove from microwave and invert on plate and enjoy!


*To make the chia egg measure out 1 Tbsp chia seeds and stir in 3 Tbsp water then let sit for 10-15 minutes until seeds have absorbed most of the water and formed a gel-like substance.


Wednesday, February 26, 2014

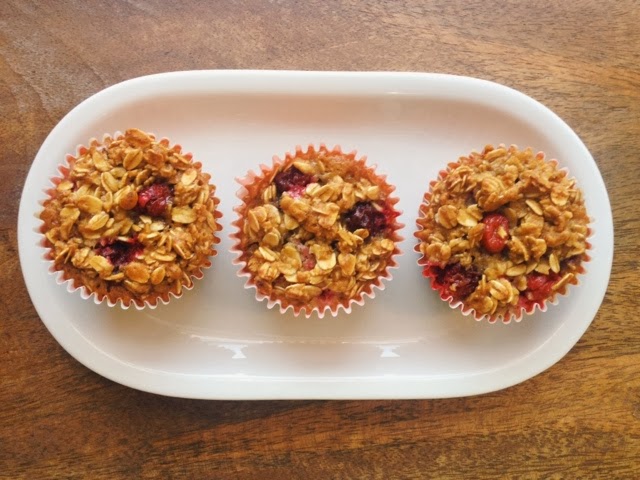
Cranberry Oat Muffins

Cranberry Oat Muffins

Staple recipes are something that are hard to come by in my family. Between my moms cooking and my baking, we are always trying new recipes. These oat muffins are an exception: they are a staple. Mom makes a big batch then throws them in the freezer, and we have them to pull out for breakfast on the run. I guess I'd have to say these come from My Mother's Kitchen, not mine, but I still love them enough to share. (plus they're so pretty looking)

The originally recipe called for a cup or so of oil, but one time mom accidentally forgot put the oil in. One of those freak things that usually ruins the whole batch, but in this case made them even better! Ever since then these have been oil free.

These muffins are a perfect balance of sweet and tart. The agave and oats make them sweet, then when you bite in to one of the fresh cranberries and get a little pop of tart. Like I said before, they make a large batch, 32 muffins, which makes them great for freezing and pulling out for later. 

Cranberry Oat Muffins


Cranberry Oat Muffins

Makes 32 muffins
115 calories per muffin 

Ingredients:

6 eggs
1 tsp baking powder 
1 tsp baking soda
1 1⁄2 cups agave syrup
1 1⁄2 tsp vanilla extract 

2 tsp ginger
1 tsp salt
4 cups rolled oats
1 cups spelt flour
2 cups fresh/frozen cranberries


Directions:


  1. Preheat oven to 350. Line two and a half 12-cup muffin tins with muffin liners. 
  2. Combine eggs, baking powder, and soda in large bowl. Add agave syrup, vanilla, ginger and salt.
  3. Blend oats into wet ingredients using spoon or whisk. Stir in flour then add cranberries.
  4. Fill muffin cups 3⁄4 full with batter. Bake 15-20 Min.
  5. Allow muffins to cool in pans then turn out.

Saturday, February 22, 2014

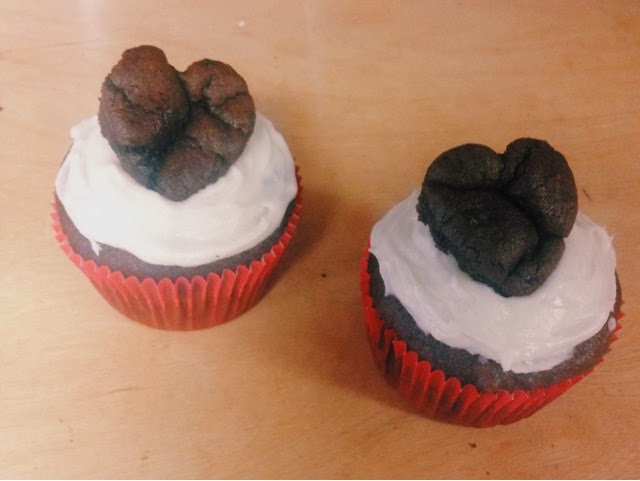
Chocolate Valentine's Cupcakes

Chocolate Valentine's Cupcakes
Better to post late than never, right? I made these cupcakes as part of my gift to my boyfriend for Valentine's Day. The boy is a picky one when it comes to food, especially desserts. The basic rule of thumb is chocolate. No caramel, no mint, no fruit, no coconut- just chocolate (and sometimes peanut butter). I wanted to make him something that he would like, but something that I would eat too. The line between these two things is a thin one, but I was up for the challenge.

The original recipe calls them muffins and omits the frosting. In order to please my boy, I added frosting. So the muffins became cupcakes and soon the cupcakes bore little hearts on top to theme the day.

Overall, these were so easy to make and turned out great! They were rich and chocolatey with a touch of peanut butter taste. The cupcakes are gluten free, dairy free, and their only sugar is honey. The added frosting is a normal frosting recipe (I had to leave something normal for him), so it contains sugar, butter, and milk. I simply left some unfrosted for myself to eat. Best part of the story? He liked them! No complaints and no suspicions. It's the little victories in life that matter.

Chocolate Valentine's Cupcakes


Makes 8 cupcakes

Ingredients:


Cupcakes:
1/2 cup peanut butter (almond butter, or any other nut butter would work too)
1 ripe medium banana
1 egg
1/4 cup honey
1/4 cup unsweetened cocoa powder
2 Tbsp. ground flaxseed
1 tsp. vanilla extract
1/2 tsp. baking soda
1/4 cup Enjoy Life dairy free chocolate chips


Frosting:

2 Tbsp butter
1 cup powdered sugar
1 Tbsp Milk 
Splash of vanilla 
(<1/4 tsp)Pinch of salt


Directions:

1. Preheat oven to 375F and prepare a muffin pan by putting 8 muffin tins in pan. Set aside
2. Add all ingredients except for chocolate chips to a blender and blend on high until batter is smooth and creamy. I used a Magic Bullet since I don't own a blender at school. This worked great as well, just be sure to put the liquid near the blade. Stir in chocolate chips by hand.
3. Pour batter into prepared muffin pan, filling each cavity until it is about 3/4 full.
4. Bake for 10-12 minutes, until the tops of cupcakes are set and a toothpick inserted into the middle comes out clean. Allow cupcakes to cool in pan for ~10 minutes before removing.
5. While cupcakes bake and cool make the frosting by adding all ingredients to a small bowl and mixing thoroughly with an electric hand mixer.
 If adding frosting and heart:
1. Allow cupcakes to cool completely. Using 1-inch heart shaped cookie cutter, punch out a heart from the center of two of your cupcakes. The heart will be extremely thick.
2. Cut the heart in half so you are left with two thinner hearts.
3. Frost the remaining cupcakes using a knife and place heart on top.